
When it comes to how to layer a meat and cheese sandwich, the process goes beyond simply stacking ingredients—it’s an art form that enhances the taste, texture, and overall enjoyment of your meal. Learning how to layer a meat and cheese sandwich properly ensures every bite delivers the perfect balance of flavors, textures, and moisture. With the right technique, you can elevate a simple sandwich into a culinary masterpiece. Whether you’re preparing a classic ham and Swiss or a more elaborate deli creation, mastering how to layer a meat and cheese sandwich guarantees your meal will impress every time.
Moreover, in this article, we’ll explore the fundamentals of how to layer a meat and cheese sandwich, from selecting the best ingredients to mastering the proper order of assembly. Whether you’re a seasoned sandwich enthusiast looking to refine your skills or a novice eager to elevate your meals, this comprehensive guide has you covered. By the end, you’ll not only understand how to layer a meat and cheese sandwich for maximum flavor but also create sandwiches that are visually appealing and structurally sound.
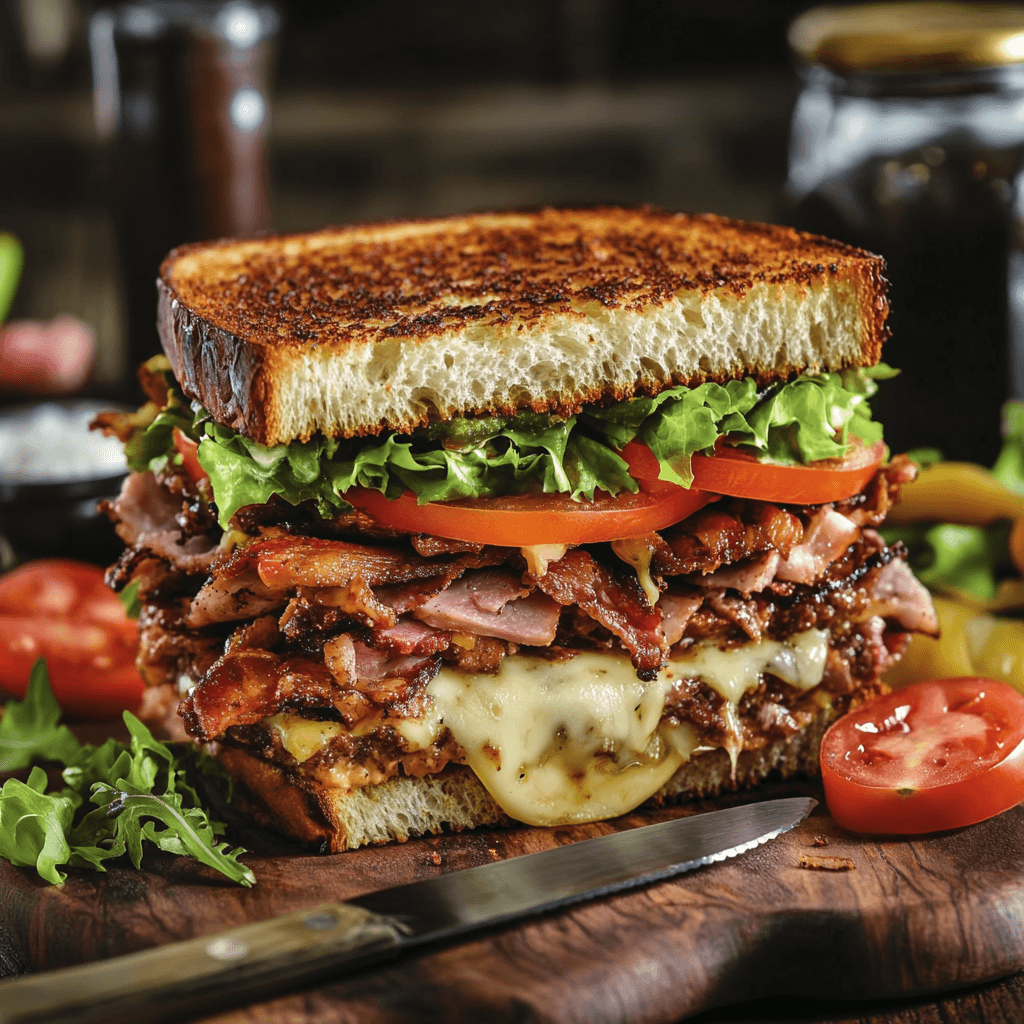
Table of Contents
Additionally, as you dive into the art of sandwich-making, you’ll discover how small changes can make a big difference in elevating your creations. So, get ready to take your sandwich skills to the next level with these detailed tips and techniques!
Understanding Sandwich Basics
Understanding Sandwich Basics
Before you start assembling your sandwich, it’s important to understand the essential steps for how to layer a meat and cheese sandwich perfectly. From choosing the right bread to picking complementary meats and cheeses, every component plays a crucial role in achieving the ideal balance of flavors. Knowing how to layer a meat and cheese sandwich properly can transform a simple meal into a delightful experience, ensuring each bite delivers the best combination of taste and texture.
Types of Bread: Choosing the Foundation
The bread you choose serves as the foundation for your sandwich. It provides structure and greatly influences the flavor and texture. Here are some popular options:
- White Bread: Soft and neutral, ideal for classic combinations like ham and cheese.
- Whole Wheat Bread: Adds a nutty flavor and extra fiber, perfect for turkey or chicken sandwiches.
- Sourdough: A tangy and chewy option that pairs well with sharp cheeses and rich meats like pastrami.
- Rye Bread: Its earthy taste is perfect for classic sandwiches like Reubens or corned beef.
- Baguette or Ciabatta: Sturdy and crusty, ideal for sandwiches with hearty fillings like salami and provolone.
When selecting your bread, consider how well it will hold up against the moisture of the fillings. Thin slices of soft bread may become soggy if heavily layered.
Exploring Meats and Cheeses
The star ingredients in a meat and cheese sandwich are, of course, the meat and cheese. Choosing high-quality options can make all the difference.
- Meats: Deli meats such as turkey, ham, roast beef, salami, or chicken are classics. For a more premium touch, consider prosciutto, pastrami, or smoked meats. Always slice the meat thinly to allow for better layering.
- Cheeses: Cheddar, Swiss, provolone, mozzarella, and gouda are great choices. Pairing is key—sharp cheddar complements turkey, while mild mozzarella works well with salami.
- Combos to Try: Turkey and Swiss, ham and cheddar, roast beef and blue cheese.
Essential Condiments and Spreads
Condiments play a crucial role in adding moisture, tang, and a hint of spice to your sandwich. However, too much can overpower the other ingredients or make the bread soggy. Here are some popular choices:
- Mayonnaise: A creamy option that pairs well with nearly all meats and cheeses.
- Mustard: Adds a tangy kick, available in varieties like Dijon, honey mustard, or spicy brown.
- Butter: Provides richness and acts as a barrier against sogginess.
- Specialty Spreads: Hummus, pesto, or aioli can give your sandwich a gourmet twist.
The Science of Layering
The Science of Layering
Layering a sandwich is more than just aesthetics—it’s about mastering how to layer a meat and cheese sandwich to create a balanced bite that maximizes taste, texture, and structural integrity. Without understanding how to layer a meat and cheese sandwich correctly, you risk uneven flavors, sogginess, or even a messy eating experience. Let’s dive into the principles that make sandwich layering an art and discover the secrets to crafting the perfect bite every time.
Why Layering Affects Taste and Texture
Each layer of your sandwich contributes to the overall experience. Proper layering ensures:
- Flavor Distribution: Evenly distributed ingredients ensure that every bite includes a mix of flavors.
- Texture Contrast: Combining soft cheese, crisp lettuce, and tender meat creates an enjoyable variety in each bite.
- Moisture Control: Strategic placement of spreads and moist ingredients prevents sogginess and preserves the bread’s texture.
A great sandwich engages all your senses, and thoughtful layering plays a major role in achieving this.
Balancing Flavors and Textures
The secret to a memorable sandwich lies in balancing contrasting yet complementary elements:
- Flavors:
- Sweet (e.g., honey ham, cranberry sauce) balances savory meats.
- Sharp (e.g., aged cheddar) contrasts mild flavors.
- Spicy (e.g., jalapeños, spicy mustard) adds excitement.
- Textures:
- Soft and Creamy: Cheeses and spreads.
- Crunchy: Lettuce, onions, or pickles.
- Tender: Sliced meats.
Achieving balance requires experimenting with ingredient combinations to suit your preferences.
Avoiding Soggy Sandwiches
Nobody enjoys a sandwich that falls apart due to excess moisture. Here are some practical tips:
- Spread Placement: Apply spreads like mayonnaise or mustard directly onto the bread to create a moisture barrier.
- Pat Dry Ingredients: For items like lettuce, tomatoes, or pickles, blot them with a paper towel to remove excess moisture.
- Order of Ingredients: Place wetter ingredients (like tomatoes or pickles) between drier layers, such as cheese or meat, to keep the bread dry.
- Use Sturdy Bread: Opt for bread with a denser structure, like ciabatta or baguette, to handle moist fillings better.
Step-by-Step Guide to Layering
Step-by-Step Guide to Layering
Now that you understand the basics and science of sandwich layering, let’s delve deeper into how to layer a meat and cheese sandwich for the perfect result. A well-layered sandwich isn’t just about taste—it’s about creating a balanced, structurally sound masterpiece. Mastering how to layer a meat and cheese sandwich ensures every bite is flavorful, with the ideal mix of textures and ingredients. By following these detailed steps on how to layer a meat and cheese sandwich, you’ll not only create a delicious meal but also elevate your sandwich-making skills to a professional level.
Step 1 – Preparing the Bread
The bread is your canvas, and how you prepare it will set the tone for the sandwich. Here’s how to do it right:
- Slice Evenly: If your bread isn’t pre-sliced, use a sharp knife to cut even slices. Uneven bread can make your sandwich unstable.
- Toast or Not to Toast:
- Toasting adds crunch and prevents sogginess, especially if your sandwich contains moist ingredients.
- For softer sandwiches, skip toasting but ensure the bread is fresh.
- Optional Buttering: Spread a thin layer of butter on the inside to act as a moisture barrier and add a subtle richness.
Step 2 – Applying the Spread
Spreads add flavor and moisture but need to be applied with care:
- Even Distribution: Use a butter knife or spatula to apply a thin, even layer of your chosen spread (e.g., mayonnaise, mustard, or aioli).
- Double Sided or Single Sided: Spread on both slices of bread if you prefer a richer sandwich. Otherwise, one side is enough for lighter options.
- Tip: If using multiple spreads, apply complementary flavors (e.g., mustard and mayo) on opposite slices of bread.
Step 3 – Adding the Cheese
Cheese is best placed next to the bread or spread for several reasons:
- Moisture Barrier: Cheese acts as a shield, protecting the bread from absorbing too much liquid.
- Flavor Foundation: Start with a mild cheese like Swiss or provolone for a neutral base, or go bold with cheddar or blue cheese for a punchy start.
- Layering Tip: Use one or two slices, overlapping slightly to cover the entire surface.
Step 4 – Placing the Meat
Next comes the star of the show: the meat. Proper layering ensures a satisfying bite:
- Thin Slices: Use deli-sliced meats for easy layering and even distribution.
- Fold or Fan: Folding the meat creates height and prevents a flat, dull appearance. Overlap each slice slightly for full coverage.
- Double Layers: For a heartier sandwich, add a second layer of meat on top of the first.
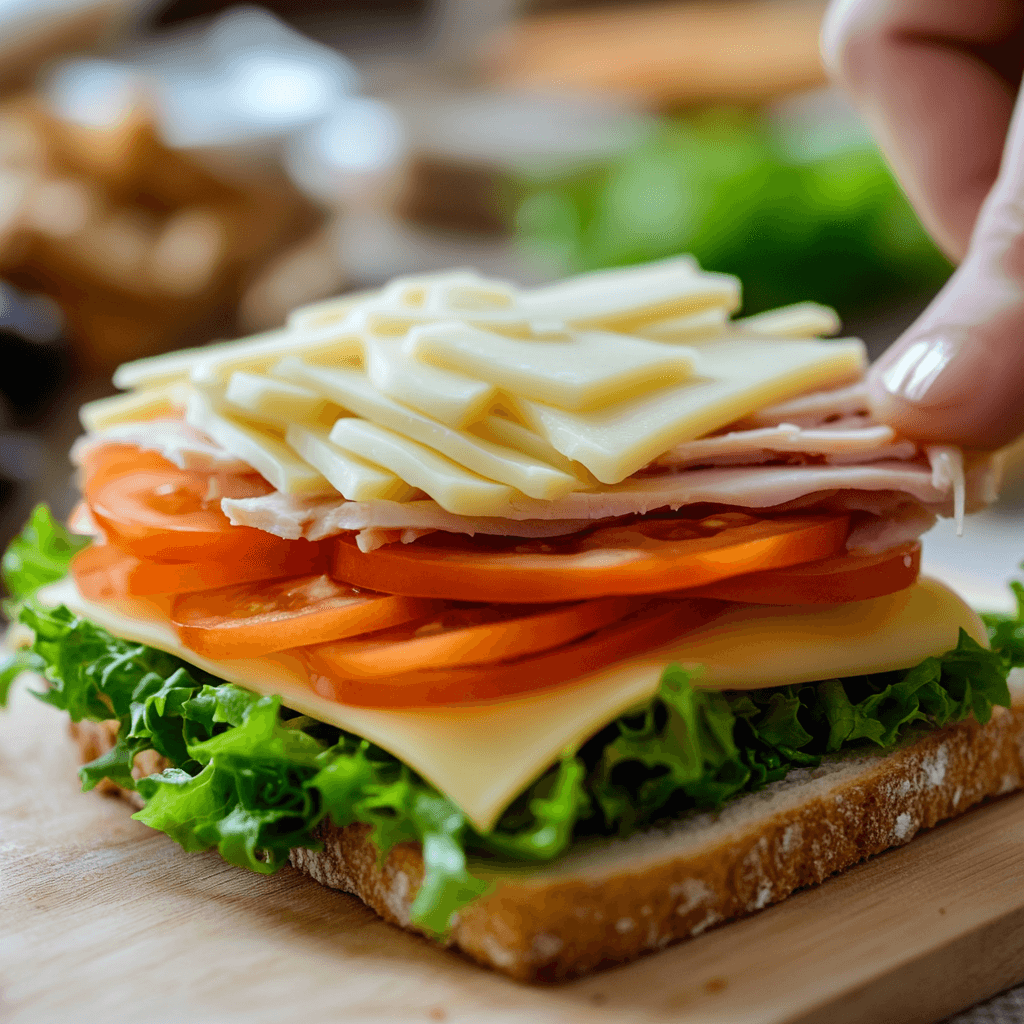
Step 5 – Including Vegetables and Extras
Vegetables and additional toppings add crunch and freshness. Layer them carefully to maintain structure:
- Start with Leafy Greens: Lay lettuce or spinach flat on top of the meat. Choose sturdy greens that won’t wilt quickly.
- Add Sliced Veggies: Tomatoes, cucumbers, or onions should be placed next. Ensure they are thinly sliced and patted dry to avoid sogginess.
- Extras: Include pickles, jalapeños, or olives for added zest. Place them evenly to avoid a lopsided sandwich.
Step 6 – The Final Topping Layer
The final layer brings everything together:
- Top with Spreads (Optional): If you’re adding an extra spread like hummus or pesto, spread it thinly on the underside of the top slice of bread.
- Add a Crunch Element: If desired, sprinkle crispy onions or crushed chips for texture.
- Cap It Off: Place the top slice of bread gently, pressing down slightly to secure the layers.
Creative Variations
Creative Variations
While understanding how to layer a meat and cheese sandwich is essential for mastering the basics, experimenting with creative combinations and styles can take your sandwich game to the next level. By applying the principles of how to layer a meat and cheese sandwich, you can create not only classic pairings but also exciting gourmet twists that elevate every bite. These innovative ideas will inspire your next delicious creation and ensure you enjoy the perfect sandwich every time.
Classic Combinations to Try
Sometimes, simplicity is best. These tried-and-true combinations are guaranteed to satisfy:
- Ham and Swiss: A classic pairing, enhanced with a smear of Dijon mustard and a slice of tomato on rye bread.
- Turkey and Cheddar: Add a layer of crisp lettuce and a touch of mayo on whole wheat for a wholesome treat.
- Roast Beef and Provolone: Elevate this combo with horseradish sauce and caramelized onions on a baguette.
- Pastrami and Swiss: Perfect with a dollop of spicy brown mustard and a layer of pickles on rye.
Gourmet Ideas for a Unique Twist
If you’re looking to impress, these gourmet variations are sure to turn heads:
- Italian Panini: Layer salami, mortadella, and provolone with roasted red peppers and pesto on ciabatta. Press and toast for a warm, melty delight.
- French-Inspired Croque Monsieur: Combine ham and Gruyère cheese on sourdough, then grill with béchamel sauce for an indulgent twist.
- Mediterranean Style: Use grilled chicken, feta cheese, spinach, and tzatziki sauce on flatbread for a refreshing, healthy option.
- Smoky BBQ Sandwich: Pulled pork, smoked gouda, and coleslaw layered on a brioche bun create a smoky-sweet masterpiece.
Vegetarian and Vegan Options
You don’t need meat to make a delicious layered sandwich. Try these vegetarian and vegan alternatives:
- Caprese Sandwich: Layer fresh mozzarella, sliced tomatoes, and basil with a drizzle of balsamic glaze on focaccia.
- Grilled Veggie Delight: Use roasted eggplant, zucchini, bell peppers, and hummus on a baguette for a hearty, plant-based option.
- Vegan BLT: Layer smoky tempeh bacon, lettuce, and tomato with vegan mayo on toasted whole-grain bread.
- Tofu and Avocado: Grilled tofu, sliced avocado, spinach, and vegan cheese on multigrain bread make for a protein-packed meal.
Adding a Regional Flair
Incorporating regional flavors can transform your sandwich into a culinary journey:
- Mexican-Inspired: Add grilled chicken, pepper jack cheese, guacamole, and pickled jalapeños on a tortilla or bolillo roll.
- Middle Eastern Touch: Use spiced lamb, halloumi cheese, and tahini sauce with pickled vegetables in pita bread.
- Southern-Style: Fried chicken, cheddar cheese, and a smear of spicy mayo on a biscuit offer a taste of the South.
FAQs
FAQs
Here are some of the most frequently asked questions about layering and making a meat and cheese sandwich, complete with expert answers to help you perfect your creations.
How do I prevent my sandwich from becoming soggy?
To avoid sogginess:
- Choose sturdy bread such as sourdough, rye, or ciabatta, which can hold up against moisture.
- Apply spreads sparingly and use them as a barrier between the bread and wetter ingredients.
- Pat dry vegetables like tomatoes and pickles to remove excess water.
- Assemble just before serving to maintain freshness. If you must prepare it in advance, wrap the sandwich tightly in parchment paper and refrigerate it.
What cheeses pair best with certain meats?
Here are some classic pairings:
- Turkey: Swiss, cheddar, or brie.
- Ham: Provolone, Swiss, or gouda.
- Roast Beef: Blue cheese, havarti, or provolone.
- Salami: Mozzarella, fontina, or Asiago.
Experiment with different combinations to find your preferred match!
Can I make my sandwich ahead of time?
Yes, but take precautions:
- Use spreads like butter or mayonnaise to create a moisture barrier on the bread.
- Assemble all ingredients except wet toppings like tomatoes or pickles, and add them right before eating.
- Store the sandwich tightly wrapped in parchment paper or plastic wrap in the refrigerator. Consume it within 24 hours for the best taste and texture.
How do I store leftover sandwiches?
To store leftovers:
- Wrap tightly: Use plastic wrap or aluminum foil to keep the sandwich intact and prevent drying out.
- Refrigerate: Place the wrapped sandwich in an airtight container and refrigerate for up to 2 days.
- Reheat carefully: For sandwiches with melted cheese or toasted bread, reheat in a toaster oven to restore crispness.
What are some low-carb bread options for sandwiches?
If you’re watching your carbs, consider these alternatives:
- Lettuce Wraps: Crisp leaves like iceberg or romaine act as a low-carb “bread.”
- Cabbage Leaves: Slightly steamed cabbage leaves can hold hearty fillings.
- Almond Flour Bread: A keto-friendly substitute.
- Cloud Bread: Made from eggs and cream cheese, it’s fluffy and low in carbs.
Are open-faced sandwiches layered differently?

Yes, open-faced sandwiches require a slightly different approach:
- Use sturdier bread to support the toppings without falling apart.
- Start with a spread to anchor the toppings.
- Stack ingredients more carefully, emphasizing visual appeal since the sandwich will be exposed.
- Consider adding a melted cheese topping to “seal” the layers and keep them in place.
Conclusion
A well-layered meat and cheese sandwich is more than just a meal; it’s an art form that perfectly showcases how to layer a meat and cheese sandwich to balance flavor, texture, and presentation. By mastering the basics of sandwich assembly, carefully selecting high-quality ingredients, and understanding how to layer a meat and cheese sandwich with precision, you can craft a creation that’s not only irresistibly delicious but also deeply satisfying. Elevate your sandwich-making skills by following these proven techniques for perfection.
Moreover, when learning how to layer a meat and cheese sandwich, paying attention to details such as the order of ingredients and their complementary flavors can make a significant difference. For instance, strategically placing spreads helps with moisture control, while thoughtfully layering the cheese and meat enhances both taste and texture. Mastering how to layer a meat and cheese sandwich ensures that every component works harmoniously for a satisfying and delicious result.
In addition, experimenting with unique ingredient combinations is a great way to refine how to layer a meat and cheese sandwich and take your sandwich-making skills to new heights. Whether you prefer sticking to classic recipes, exploring gourmet options, or trying vegetarian alternatives, understanding how to layer a meat and cheese sandwich opens up endless possibilities for creating something extraordinary. By combining creativity with proper technique, you can transform any sandwich into a masterpiece.
Print
How to layer a meat and cheese sandwich?
- Total Time: 5 minutes
- Yield: 1 sandwich 1x
Description
A timeless, satisfying sandwich that’s perfect for lunch or a quick snack! This recipe combines savory deli meats, creamy cheese, and fresh toppings for a perfectly balanced bite. Customize it with your favorite condiments and bread.
Ingredients
Ingredients
Sandwich Base:
- 2 slices of your favorite bread (white, whole grain, sourdough, or rye)
- 3–4 slices of deli meat (ham, turkey, roast beef, or salami)
- 2 slices of cheese (cheddar, Swiss, provolone, or American)
Optional Toppings:
- Lettuce leaves
- 2 slices of tomato
- 3–4 cucumber slices
- 1–2 slices of red onion
Condiments:
- 1 tablespoon mayonnaise or butter
- 1 teaspoon mustard (yellow, Dijon, or spicy brown)
Instructions
Instructions
Prepare the Bread:
Lay the bread slices on a clean surface. If desired, lightly toast them for a crisp texture.Add Condiments:
Spread mayonnaise (or butter) on one slice of bread. Spread mustard on the other slice.Layer the Sandwich:
- Place a slice of cheese on one slice of bread.
- Add the deli meat evenly over the cheese.
- Layer any desired toppings like lettuce, tomato, cucumber, or onion.
- Top with the second slice of cheese for extra creaminess.
Assemble and Serve:
Place the second slice of bread on top, condiments facing the filling. Gently press down to secure the sandwich.Slice and Enjoy:
Cut the sandwich in half diagonally or vertically. Serve immediately.
Notes

- Prep Time: 5 minutes
- Cook Time: 0 minutes
- Category: Lunch
- Method: Assembly
- Cuisine: American